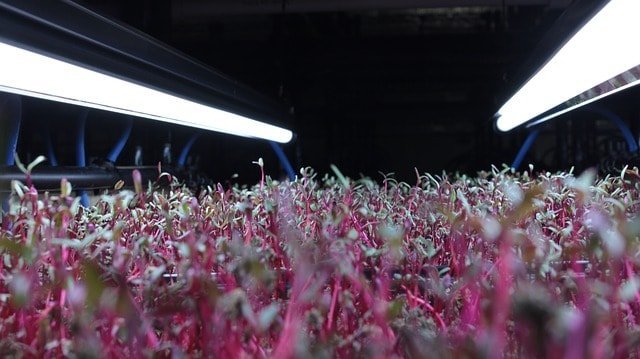
At some point over the last couple years I’m sure you’ve heard someone mention microgreens. Maybe it was their ease of growing, their amazing taste, or their crazy revenue potential that first started the conversation; but no matter what it was you’re now ready to get growing.
- Find the right space
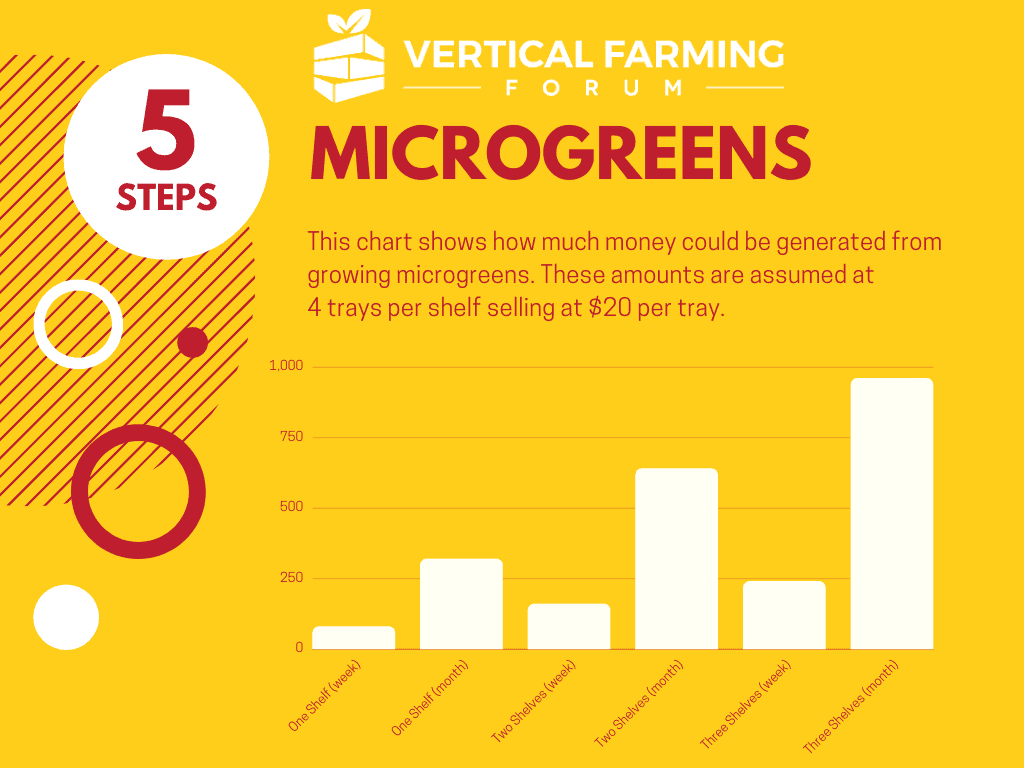
All you really need for a personal microgreen stash is a small shelf, and if it’s near a window, you don’t even need a light; but if you are trying to grow a bit more, it is one of the easiest crops to scale up and go vertical with. All you need is a four foot by two foot area, three lights, a fan and a wire shelving unit—boom, you have the space to start efficiently growing microgreens. With this set up you have three growing shelves that have the capacity to fit four trays of greens for a total of 12 trays, which you can harvest every seven days. You also have a top, unlit shelf that can be used to start the seeds for a fully contained system. - Get quality seeds and a quality germination method for the ultimate yield.
Make sure that you source high quality, untreated microgreen seeds with a high germination rate. Drench your soil (which if you are doing the rack system, will be in one inch 1020 grow trays), spread the seeds evenly, and stack anywhere from 1-3 trays on top to block out the light. Stacking trays allows you to save space, and it doesn’t harm the plants. Let the seeds sit for three days to allow for germination before moving them to one of your vertically integrated shelves. - Give them quality water and soil.
Microgreens don’t need any added nutrients. Just make sure that you water them with clean, de-chlorinated water and use a good seed starting, or other fine soil mix. I personally use the “Raised Bed Mix” from Paonia Soil Co. - Now you’re ready to harvest.
After about 7-10 days and a couple of waterings your microgreens should be ready to harvest. With most varieties you harvest them before their “true leaf” stage, which would be their second set of leaves. Some people use scissors to harvest, but I find it easier to use a sharp kitchen knife. You can grab a handful of the greens and pull up on them while slicing the base with the knife. Just a few cuts and an entire tray is harvested. From there I just throw the soil in the compost pile and rinse the tray. I’ve heard of people re-growing trays, but it is very slow and with reduced yields, so is overall not worth it. - Storage
If you harvest while the plants are dry, and immediately place them in the fridge without washing, they should last for up to two weeks. Since you are growing indoors, there really shouldn’t be anything on the greens to wash off, but you can always wash them before use if you would like. Washing before storage really reduces their shelf life. Once their stored you can either eat them all up or round up some customers for your amazing green goodness.
https://www.instagram.com/p/CEFZvcjB3AH/